Grow it. · PickleRadio
Pruning cucumber plants: what can you leave, train or cut?
A crowded vine does not tell you which shoot to cut. Identify the plant parts, check the variety and choose a pruning approach that fits the support you have.
In this guide8 sections
Start with the space you need back
For a first cucumber plant, we would leave healthy growth alone until its variety and training instructions are clear. That gives you time to see whether the problem is a shoot blocking the path, a vine at the roof or simply a plant larger than expected.
If young growth has wandered off its support, start by guiding the vine back onto the trellis. If leaves are yellow, spotted or wilting, use the plant-problems guide before treating the marks as a reason to prune. Cutting for shape and responding to a disease need different decisions.
Check the packet before choosing a shape
A compact plant may need very little intervention. For example, RHS lists Bush Champion as requiring no pruning. Follow the instructions for your own cultivar; “bush” on another packet does not establish an identical routine. The cucumber variety catalogue helps distinguish growth habit from the size of the cucumbers you pick.
For an outdoor climber with room on a net or trellis, we would try arranging the growth before shortening it. If you choose to pinch it, check the outdoor instructions: RHS distinguishes outdoor pinching to encourage side shoots from its greenhouse approach. Moving an outdoor cultivar into a greenhouse does not automatically give it a new pruning requirement.
A greenhouse vine on a single string needs a deliberate plan for its branches. A broader net is another option: Minnesota’s high-tunnel observations describe less pruning labour with net training, alongside possible foliar-disease disadvantages. Think about the route to the fruit and the watering point before choosing how much growth to retain.
Follow the shoot back before cutting
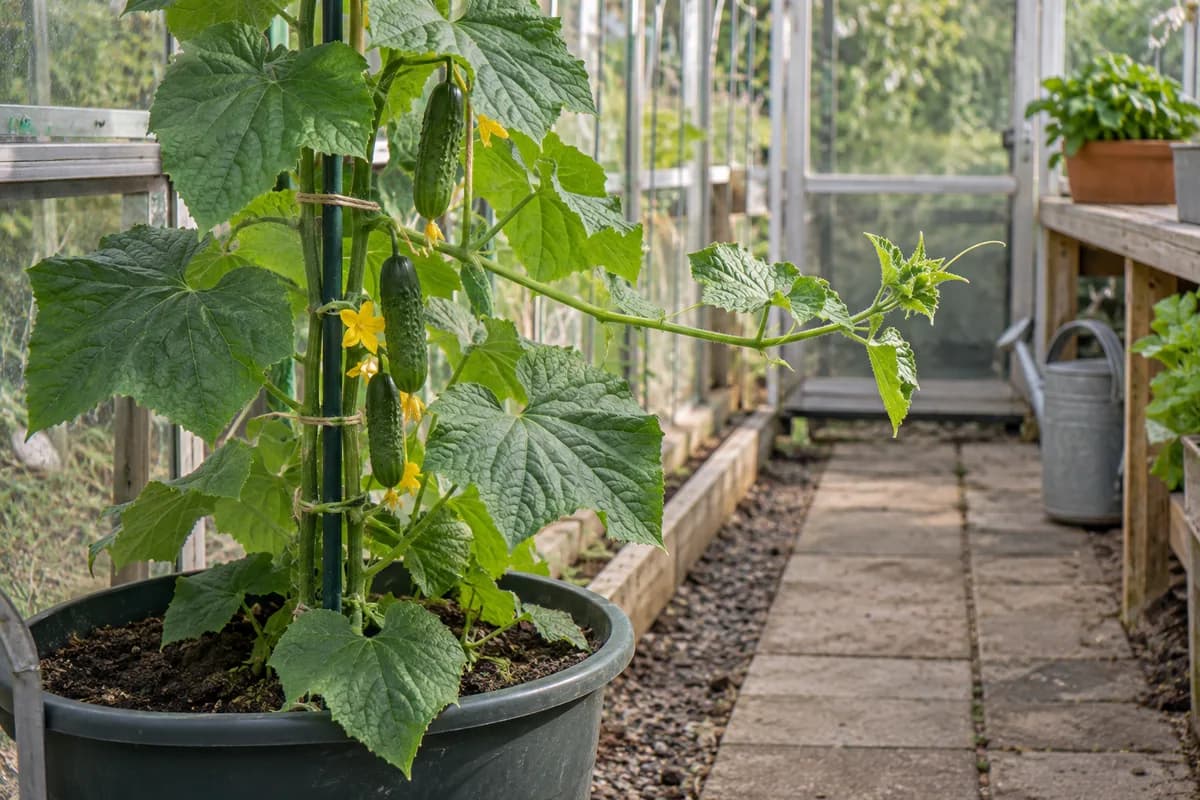
Start near the base and trace the main stem upwards. A branch coming off it is a side shoot, also called a lateral in Alaska Extension’s training instructions. At each junction, identify what you are looking at before putting fingers or blades around it.
- The main stem continues through a series of leaf attachment points, called nodes. Keep following that same stem when several branches cross.
- A leaf stalk ends in one leaf blade. A side shoot has its own growing tip and developing leaves. Removing the stalk removes that leaf; shortening the side shoot changes the branch.
- A tendril is the slender curling structure that grips a support. Its coiled shape is different from a leafy shoot.
- A female flower has a tiny cucumber behind its petals. Leave flowers and young fruit alone while identifying the branch. If flower removal is your actual question, check the flower and pollination guide for your variety.
A greenhouse example: shorten one fruiting side shoot
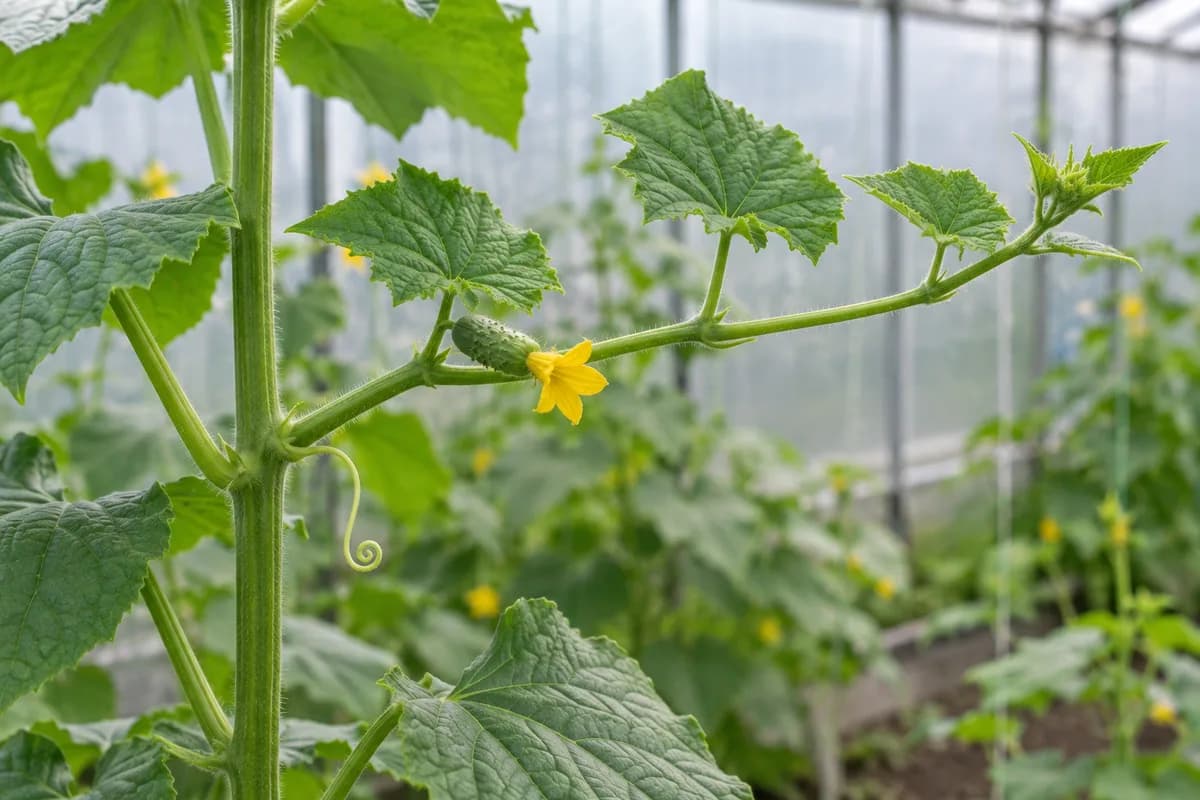
Use this only when you have chosen the RHS greenhouse method, which pinches a side shoot two leaves beyond a female flower, and it fits your cultivar’s instructions. It keeps part of that branch. A system that removes whole laterals requires a different cut.
- Trace the selected side shoot from its junction with the main stem. Find a female flower with a tiny cucumber behind it.
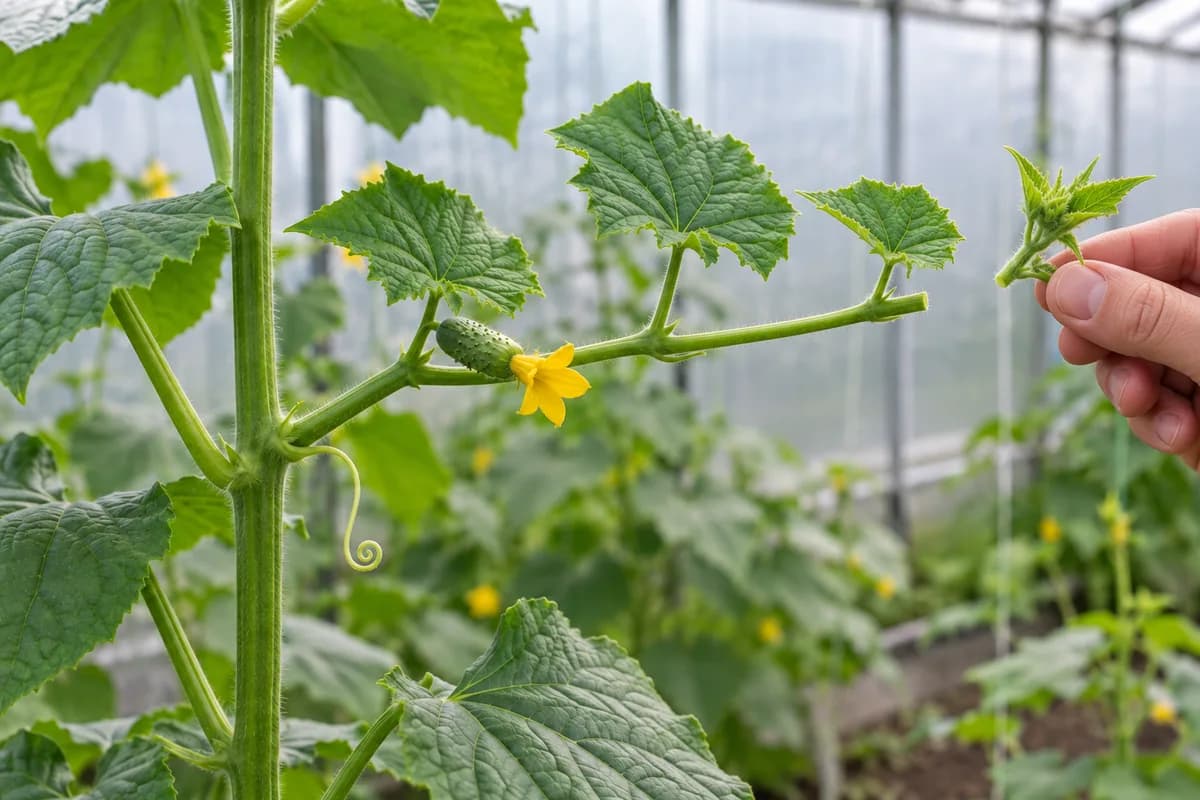
- Follow that side shoot towards its growing end and find two leaves beyond the flower. Do not count the leaf at the flower’s node. Both farther leaves and the flower stay. If the shoot has not grown that far, leave it to develop.
- Support the shoot gently. Pinch off the soft growing tip just beyond the second retained leaf with finger and thumb, without pulling on the branch.
- Check that the main stem, fruit and retained leaf stalks are intact. If the growth is tangled and you cannot distinguish them, stop and inspect from another angle.
What if the vine has reached the top?
In the RHS greenhouse approach, the main growing point is pinched when it reaches the roof. Check how your chosen system continues before doing that to a plant on a lower outdoor frame.
Alaska’s umbrella system for seedless greenhouse types retains two upper laterals to hang down from the top support. Its tree system retains side branches differently. These layouts explain why one grower keeps a shoot that another removes; each needs its own support and sequence.
For an established plant, compare the space left on the support with the instructions you started with. If you cannot identify its main stem or the replacement growth the method requires, take a clear photograph and ask the seed supplier or a local growing adviser before topping it.
Keep the healthy leaves
Leaves support the crop. Oklahoma’s greenhouse pruning guidance stresses the importance of cucumber leaf area. We would not strip a healthy vine just to make its stem easier to see. Move a leaf gently for inspection and put it back.
A few damaged leaves and a plant covered in symptoms need different assessments. The powdery-mildew guide explains selective removal and what to consider when very little useful foliage would remain. For unexplained yellowing, work through the yellow-leaf checks first.
Make the next visit a small job
Once you have selected a method, check new growth during your normal plant-care visits. Minnesota advises starting pruning early and keeping up with it to avoid removing too much at once. Revisit the parts your method manages and see which tips need attention.
If you use snips, remove visible debris before disinfecting the blades. Follow directions for the tool and disinfectant, and clean and disinfect after an infected plant before moving to the next. Collect the removed material as you work so you can still see the stem and pot surface.
Write down the cultivar and method beside your growing notes. A photo of the shoot you kept is useful at the next visit, especially if someone else will be looking after the plant.
Sources
Checked 18 September 2026. The worked example is one greenhouse training method; cultivar instructions and growing systems can differ.
- RHS: How to grow cucumbers
- RHS: Cucumis sativus Bush Champion
- University of Alaska Fairbanks: Growing Cucumbers in Greenhouses
- University of Minnesota Extension: Weekly vegetable update June 11, 2026
- Oklahoma State University: Pruning Hydroponic Crops
- University of Minnesota Extension: Clean and disinfect gardening tools and containers
Keep your project growing.
Still choosing? Find my cucumber.Support a cucumber growing in a pot
Choose a suitable support and keep the plant accessible as it grows.
Read the guideIf leaves look unhealthyCheck yellowing cucumber leaves
Read the leaf pattern and inspect the root zone before choosing a treatment.
Read the guideCheck plant habit and varietyCompare pickling cucumber varieties
Look at named varieties and match a choice to your space and growing conditions.
Read the guide