Grow it. · PickleRadio
Spider mites on cucumbers: check the speckles before treating
Find out what is living beneath the leaf before choosing a treatment. Use a hand lens and white card, then respond to what you actually find.
In this guide8 sections
Speckles are a reason to inspect
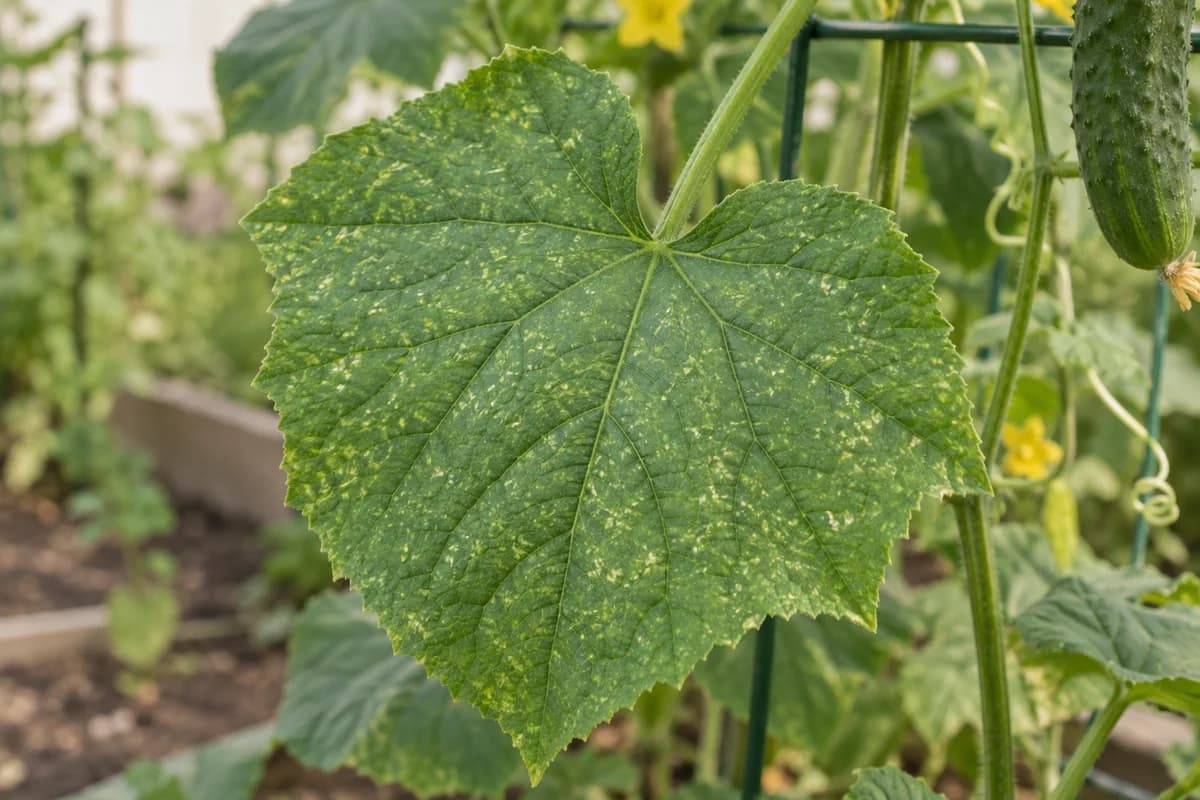
Fine pale dots scattered across a cucumber leaf deserve a look underneath. Mite feeding can leave this stippled pattern. The word means many small flecks, rather than one large yellow patch.
Take a hand lens to the plant before buying a treatment. If the marks are mainly large blotches, holes or a powdery coating, the plant-problems picture guide is a better starting point. A yellow-leaf photograph alone cannot establish that mites are present.
Look underneath with a hand lens
The scale is easy to underestimate. Two-spotted spider mites are about 0.5 mm long, so a normal phone photograph may show the damage more clearly than the animal.
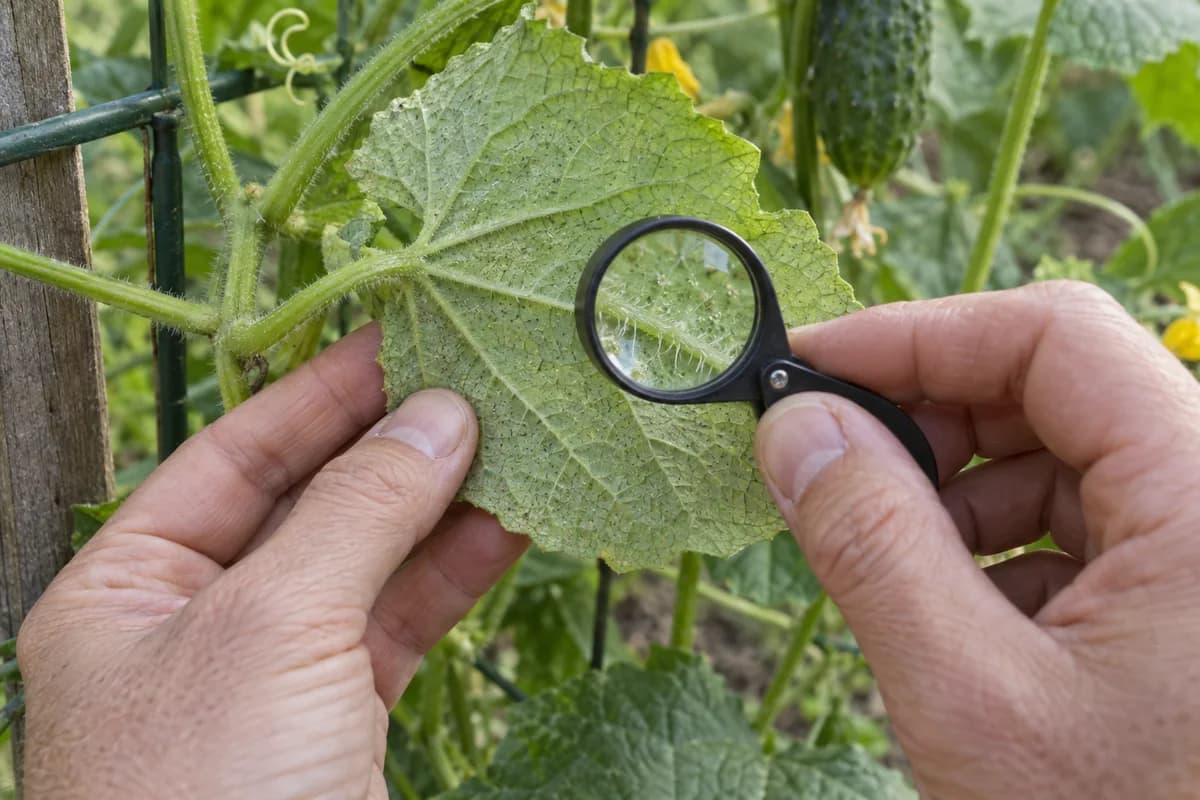
Support an attached leaf by its edge and examine the lower surface with a 10× hand lens, as recommended by UC IPM. Bring the view into focus slowly. Inspect several affected leaves, not just the easiest one to reach.
Do not insist on finding a bright red mite. RHS notes that the common glasshouse species is usually yellowish-green and that conspicuous webbing accompanies heavier attacks. A leaf without a visible web still merits inspection.
Try a white-card check
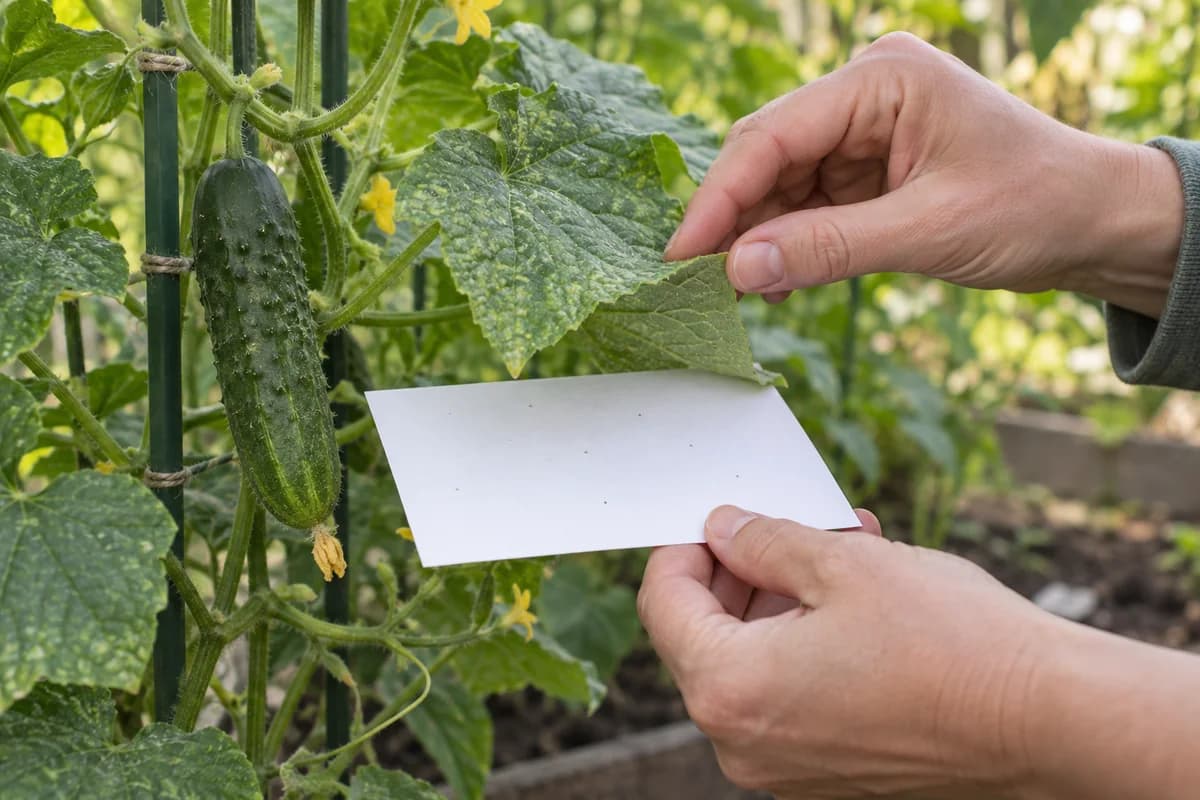
Hold clean white paper or card just beneath the leaf and tap or gently shake the leaf over it. A white background helps reveal mites shaken from the leaf. Watch for movement, then use the lens to examine what fell.
The card improves contrast; it is not an identification test. UC also describes predatory mites that feed on other mites. Save a close photograph and seek local identification if you cannot distinguish what you found.
When repeated checks find nothing, keep the symptom history open. Use the yellow-leaf checks to review the root zone and recent care. Record which leaves you checked so the next inspection adds information.
Why a hot spell can make it worse
Hot, dry conditions can favour a rapid build-up. Minnesota’s vegetable IPM guidance includes cucumbers among the crops affected by spider mites during such weather.
Check the growing mix and whether irrigation is reaching it. Follow the watering and drainage guide for the pot or bed you actually have. Do not flood an already wet container because the leaves look dry.
If you find active spider mites
On a reachable vine with useful healthy foliage, our first choice is physical removal and a follow-up inspection. Water sprays aimed at leaf undersides can reduce mite numbers. Support the leaf and use enough force to dislodge pests without tearing it or bending the vine.
Let foliage dry afterwards. Leaf moisture allows downy mildew to infect, so a targeted wash is different from repeatedly misting a closed greenhouse. Keep ventilation working; RHS cautions that higher humidity alone will not control the mites.
Leave yourself access for the next check. Avoid dragging an established, trellised plant across the patio to reach one leaf. Work around the support, or get help holding foliage steady. Inspect nearby plants too, and note which ones have visible mites.
Keep the mites’ natural enemies in the picture
A general-purpose insecticide can work against your aim. Minnesota’s vegetable IPM team warns that broad-spectrum treatments can trigger mite flare-ups and stresses protecting natural enemies. Tell an adviser what you have already applied, including the date.
For a greenhouse crop, biological control may be worth discussing early. RHS describes several predators with different strengths and limitations. Ask a specialist supplier which option fits the infestation, growing conditions and recent treatments before ordering.
Recheck the plant before choosing the next treatment
Use the same inspection method again. Minnesota suggests checking garden plants every three to five days, especially during drought. Note live mites, fresh damage and the condition of new leaves; the old speckles alone cannot tell you how many mites remain.
For a heavily affected greenhouse plant, RHS advises removal. If a small vine is badly webbed, losing foliage and nearing the end of its useful season, we would favour removing it over repeated rescue purchases. Ask locally about disposal and check its neighbours.
If further treatment is justified, seek a product currently labelled for mites on edible cucumbers in your location. Follow the label, including harvest restrictions. Minnesota cautions against homemade soap solutions because they can damage plants. A household detergent recipe is not a substitute for a formulated, suitable product.
Sources
Checked 18 September 2026. Product availability, permitted uses and biological-control choices depend on the growing situation and location.
Keep your project growing.
Check yellowing cucumber leaves
Read the leaf pattern and inspect the root zone before choosing a treatment.
Read the guideCheck root-zone careWater and feed your cucumber plant
Use the plant, potting mix and conditions to guide its everyday care.
Read the guideIf yellow patches follow the veinsCompare signs of downy mildew
Check angular yellow patches on both leaf surfaces and separate the closest lookalikes.
Read the guide